Step 3 of My Tidyness Project: Papers

Do you have a few minutes? That’s really all the time you will need to spare to read this post.

Paper sorting is the least glamourous  section of the KnonMarie method.

She only has one rule: Discard everything.

“The basic principles for sorting papers is to throw them all away.” – Marie Kondo

Easy enough, right? If you have a few papers that you’re unsure if you can toss, she does go into further detail.

Dispose of them if the papers do not fall into one of these categories:

1. Papers currently in use.

2. Papers that you  need to keep for a short period of time.

3. Must be kept indefinitely. This doesn’t include sentimental letters.


Of the papers you must keep, she goes into how to file them:

1. Papers that need to be saved. Sort by frequency of use and store them in a clear plastic file.

2. Papers that need to be attended to. This would include letters that require replies, forms that should be submitted, etc.

3. Attend to #2! Get on your replies, people! If these papers need attended to, do so quickly then discard them.


She makes it clear that you need to discard of any manuals, used checkbooks, pay-stubs and greeting cards (unless they are sentimental, then you’ll deal with those later).

That’s it.

I have no pictures to show you because it was that uneventful. This took me 30 minutes to complete (and a week to post about but that’s another story).

I cleared out our file cabinet without looking back. This step was the easiest for me and I loved it. Unfortunately, I wasn’t able to toss my husbands papers per our agreement, but I hope he is able to breeze through this step as effortlessly as I was able to.


Tagged , , , , , ,

Step 2 of My Tidyness Project: BOOKS

Let me begin by mentioning that I don’t really have many books so this was an easy one for me. I don’t like to keep a lot of books around for a couple reasons. First, I have a kindle. Second, they are so heavy to move! Have you ever filled a Uhaul moving box full of books and then tried to lift it? Me, too. It’s smart to spread them out amongst all your moving boxes or just give them away. People are always looking for free books.

Marie  Kondo has a few guidelines:

1. All books on the floor.  Grab your cookbooks, the books/magazines out of the bathroom and all the books beside your bed.  Sure, it would be easy to look at them all on the shelf and pick and choose but you must touch each book to see if it brings you joy. Warning: things are going to be dusty!

If you have a large collection and it seems overwhelming, separate the books into the following 4 categories: 1. General (pleasure) 2. Practical (reference and cookbooks) 3. Visual (photography collections and coffee table books) 4. Magazines.

2. Touch the books to see if they bring you joy. Do not start reading the books! To decide if you are going to keep a book, touch it to see if it brings you joy. Do not keep a book just because you think you might re-read it.

3. Sometime means never. If you haven’t read a book yet, you aren’t going to. Marie Kondo believes that books are time sensitive and that the best time to read a book is when it first arrives. If you have a book that has been partially read, you most likely aren’t going to finish it and the book has already served it’s purpose of being half read. Reference books and old text books are most likely not going to be used again.

Let’s review my progress, shall we? G1 and I keep most of our books in our hutch we made a few years back. I made an attempt to keep it pretty and neat, but it did seem a little mopey.

Bookshelf Before


Starting this project, I promised G1 that I wouldn’t ask him to get rid of any of his belongings nor would I take it upon myself to discard of anything that we jointly owned. But, as I am working my way through my tidyness project, he has seemed to peek an interest and offered to go through the books with me. I told him it might be a challenge to start with the books as he hadn’t gained any decision making confidence by first going through his clothes. As Marie Kondo predicted, He did struggle letting go of a few books that didn’t bring him joy, especially reference books and books he hadn’t read.

StackedonFloor

Since our book collection was rather small, I separated our books into books that belonged to G1 and books that belonged to myself. This way, I was only selecting which books to keep that I actually owned and G1 had a chance to do the same. I went first and then took this picture of G1 breaking rule #2. In his defense, it’s very hard to pick up a book and not thumb through the pages! It’s such a natural instinct!

Archer over-seeing our selection

Archer over-seeing our selection


For me, this went quickly. The confidence I gained by deciding which clothes to keep crossed over in deciding which books to keep. I kept only a few books and all of my interior design porn. Once I had finished with my books, I separated them into colors and waited for G1’s selection. I added his into the appropriate grouping and started to place them on the shelf.

Books of Joy

DetailsRed

DetailsBlue

DetailBrown

DetailsBlack

"Do I fit in White? Brown? or Green? "

“Do I fit in White? Brown? or Green? “

The aftermath?

DonationBooks

Now that I have completed clothing and books, I must say that the hardest part of my tidyness project is the actually removing the discarded items from our home. These books sat in our mudroom for a week before I was able to donate them to the library. Remember how I mentioned people love free books? As I was taking the boxes inside of the library, two ladies walked up and asked if I was giving them away. I told them I was donating them to the library and she said that she thought they were free. It was a little awkard but I was able to get them inside the library.

With the clothes, it was more about waving goodbye to all the money I had spent. With books, it was about how heavy they were and finding time to take them to the library. This is why we didn’t have many books to begin with: they are awful to move!

Just to remind myself where I started:

Bookshelf Before


And where I ended up:

ShelfAfter


The hutch is so peaceful, now and I am that much closer to finding my true style.

Next up on my tidyness project? Sorting Papers. Check out how I worked through my clothes and why I started my tidyness project.


Tagged , , , , , , ,

Step 1 of My Tidyness Project: CLOTHES


Here’s what Marie Kondo says about tidying your clothes:

1. Start with your clothes and gain momentum. Clothes are much easier to sort than mementos. You will gain momentum and confidence, as well as hone in on your decision making ability before moving on to more challenging areas.

2. In this order: Tops, bottoms, clothes that should be hung, socks, underwear, bags, accessories, clothes for specific events, and shoes.

3.Gather all your clothes onto the floor and touch each individual pieces. Check your laundry, other closets, and your car. If you miss any item of clothing, it automatically goes into the discard pile. Cut throat, right!? She reasons that if you have already forgotten about it than it must not bring you too much joy.

Rule of thumb: While going through your clothes, items you can’t part with (old t shirts for example) shouldn’t automatically be delegated as loungewear.

“Precisely because no one is there to see you, it makes far more sense to reinforce a positive self image by wearing clothes you love.”

Great advice. Self confidence comes from inside when no one is watching.

I got started on this one right away! Many times in the past I have gone through my closet and discarded quite a few items, but not at this level. It was so exhilarating.

Standing Closet Before

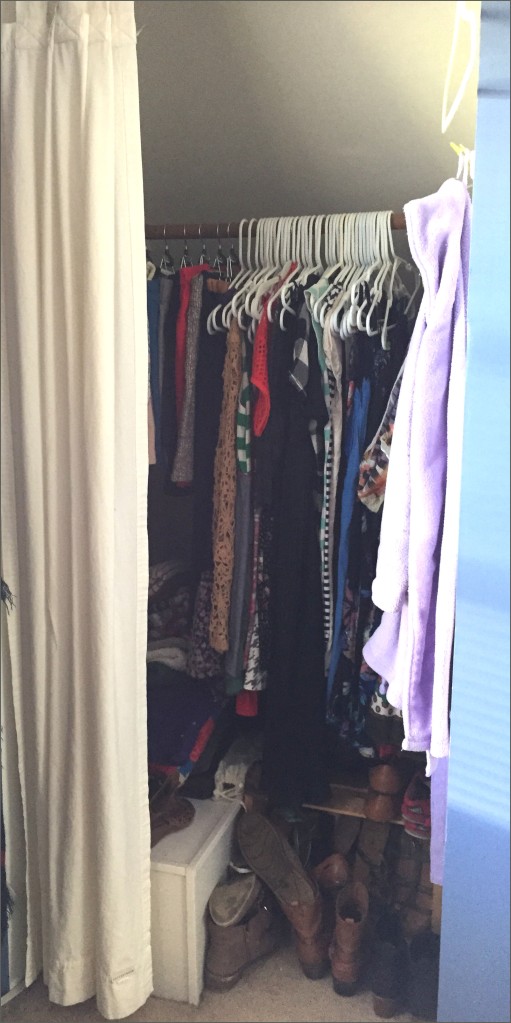
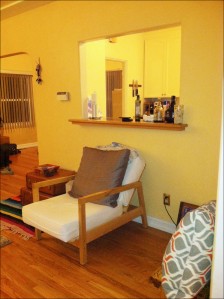
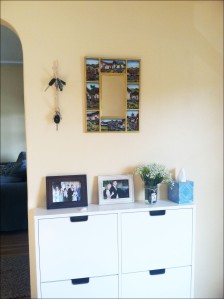
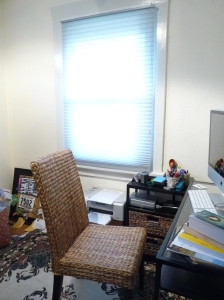
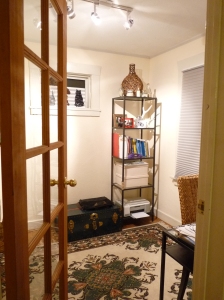
Closet #1 before I discarded.


Since I am all about being true to myself and my mission of self-discovery, I must admit that I didn’t pile everything on the floor in front of me. Nor did I start with off-season clothes. Nor did I follow her order. I did gather all my clothes from every corner of the house. I started in one of my three closets, pulled every item out and put them on the bed and sorted them into either a discard or keep pile. Then I re-hung all the items back up. Then I moved on to the next closet and then my drawers. So I hit every clothing storage area, just not in the order she suggested. Sorry Marie Kondo.

Tall Closet After

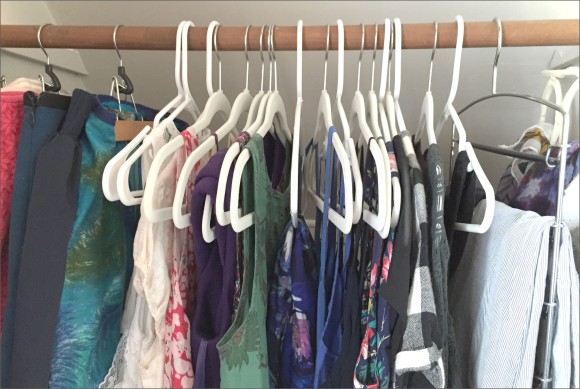
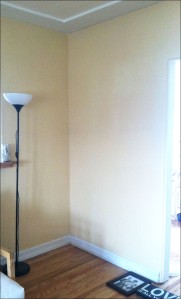
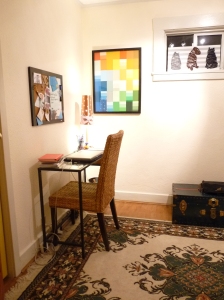
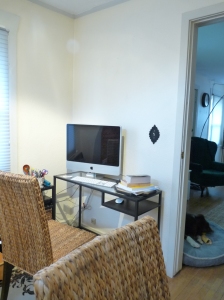
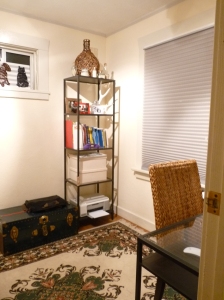
After: breathing room for the items that bring me joy.

After I finished my tall closet (my other 2 closets belong in a hobbit home) I was feeling good and ready to conquer the other two closets.
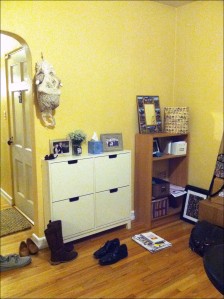
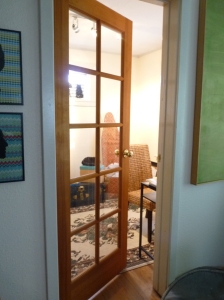
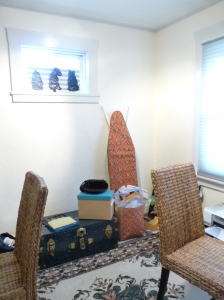
Short Closet Before

Closet #2 Before

Short Closet 3 Before

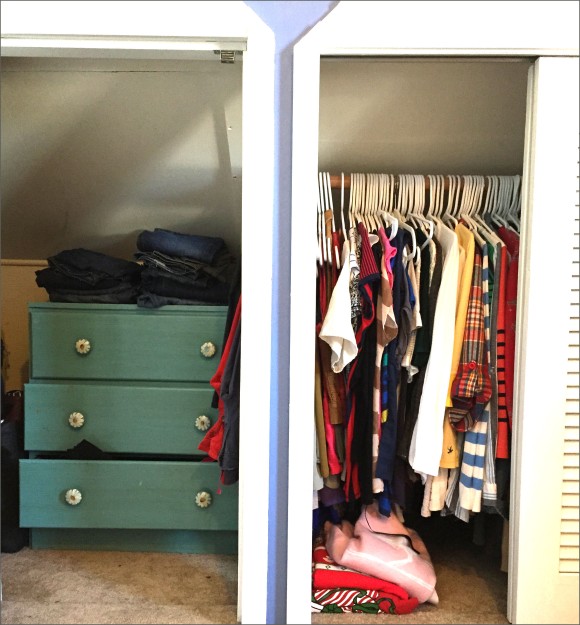
Closet #2 and #3 Before


This is when I started to utilize the floor. I was so confident tossing items into the discard pile. I think I had always wanted to get rid of them but somehow felt responsible for them. Somewhere along the line I paid money for these clothes so discarding them felt like throwing money away. Those items that I received as gifts were even harder to push aside. Marie Kondo says they have already served the purpose of being a gift and the act of receiving that gift had given you joy. It’s ok to pass them along. The giver wouldn’t want you to be burdened by holding onto something that doesn’t bring you joy. Most items I effortlessly tossed away. I began to feel confident, empowered, lighter and even happy!

BeforePile

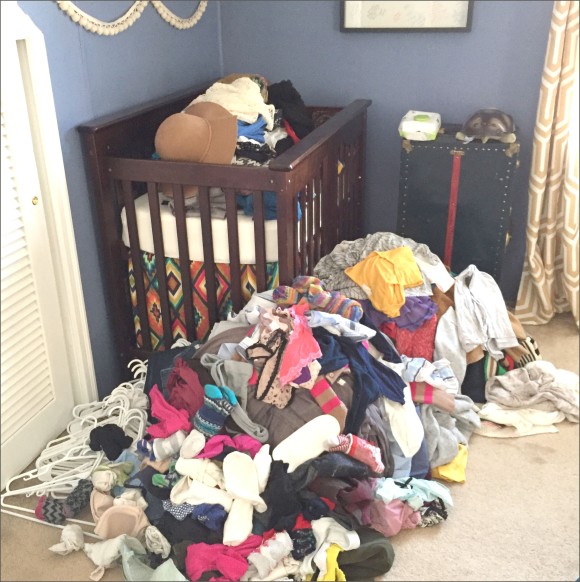
That’s a lot of clothes to be carrying around on your back. Since I was feeling confident and tossing clothes left and right I felt that I could deviate from Marie Kondo’s order a bit. After I was done with the hanging clothes in the closets, I moved onto my drawers, starting with the top drawer and visiting every drawer on the way down.

hangingafter3

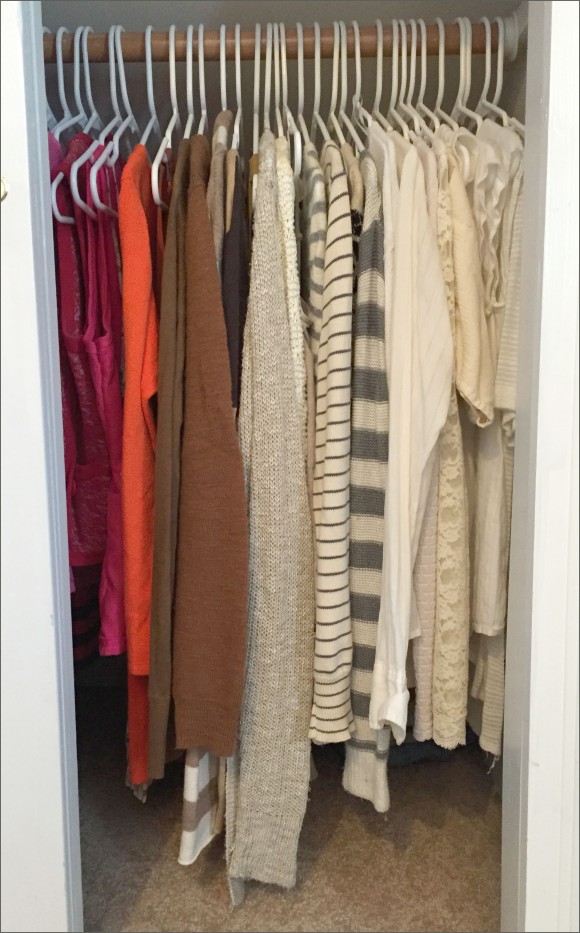
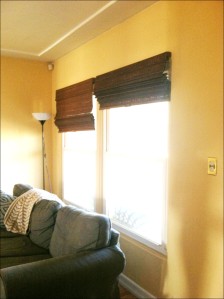
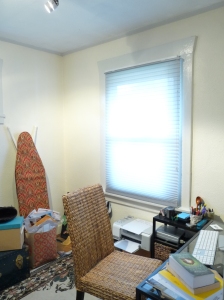
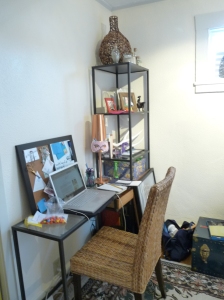
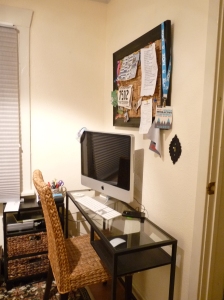
Closet #2 After the purge!

Once I had finished my drawers, I moved onto shoes and everything else left in my closets: accessories, scarves, bags, swimsuits, belts, hats. Wow, I had a lot of stuff!

When you’re done discarding it’s time to put it all away. Marie Kondo has a few pointers:

1. Either fold or hang your clothes.

2. Fold items into rectangles and stand them upright so you are able to see every item of clothing.

3. “Arrange your clothes so that they rise to the right.”

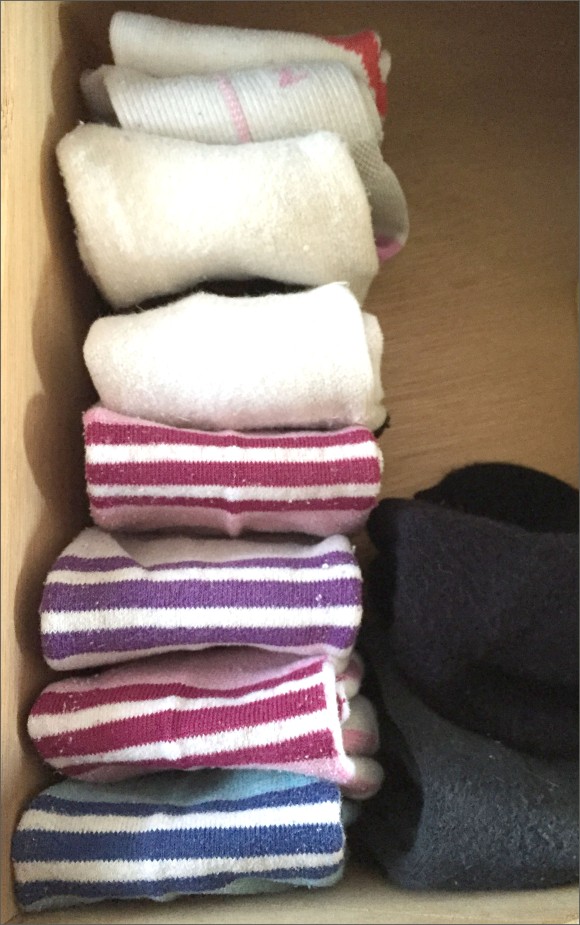
3. Lay socks folded and roll tights.

Everything that was hung before, I re-hung and then arranged my closet so that my clothes were able to rise to the right. Imagine drawing an arrow from left to right. On the left is your dark, long and heavy clothes and on the right your lighter and shorter clothes. I’m not sure if they are supposed to be color coded or not, but mine ended that way. Within each color section I had all my cardigans and long tunics/tanks and heavier sweatshirts and moving to the right I would put the lighter materials and shorter blouses. Voila. Closets are done.

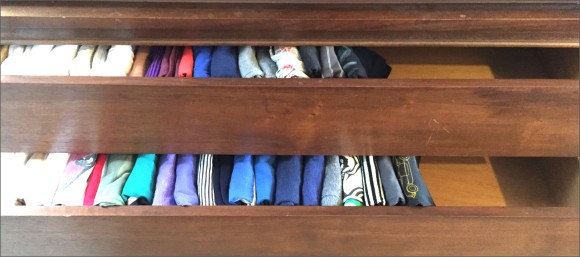
Folding my clothes was more of a hassle because of the time it takes. But in Marie Kondo’s defense this gives you an opportunity to touch each piece, pouring energy into each item. So I folded all my socks into little rectangles, rolled my tights, and moved through the rest of my drawers quite quickly.  After I had folded every item into a rectangle, I was able to stand them on edge and see each shirt. I was surprised to see I hadn’t used up my entire drawer!

Folded Socks

Folded Drawer


I felt liberated after finishing with my clothes. I surprised myself with my ability to pick and choose with such confidence. Once I started rolling, I didn’t want to stop until I looked over at the giant pile of clothes I had to physically discard. As I looked at that pile, all I could see was money. Layers and layers of cash that was about to be stuffed into garbage bags to be hauled off to a new destination. Ugh.

I decided to look through it and sell what I thought might go quickly on Ebay. That ended up being 3 items. Not a huge dent but a start. I went through again and gathered all my “trendy” items in an attempt to sell them at Plato’s Closet. That ended in a deduction of 20 items and my wallet gaining $60. Progress!

I posted an ad on our local chapter of “Buy Nothing”, a community Facebook page where you can get and give for free. Turns out a lot of ladies were interested and someone picked up the bags the next afternoon. The recipient took what she wanted and passed it on, even adding from her own closet. The bag quickly became the “sisterhood of the traveling bag”. I felt amazing! I had done it. All of my extra clothes were gone. Liberated, confident, excited.

The first time I chose an outfit post-declutter, it took me very little time because I loved everything in my closet. By choosing to keep only the things that bring me joy, I was left with items that all worked together or if you will, my style! It is actually fun to get dressed, now.

Now that I have completed the first phase of decluttering, I am ready and motivated to move onto the next phase: books.


See Part 1 of my Tidyness Project.


Tagged , , , , , , , , ,

My Experience With The Sleep Easy Solution

The 4th trimester has officially ended at the G house. During G3s four month check-up, we voiced concern about her sleeping habits. When she was tired, we would make sure she had a clean diaper, a full belly, and then bounce her to sleep using a yoga ball. Every single nap and every single night. She loved it! Falling asleep wasn’t the problem. She would sleep for maybe 40 minutes and wake up screaming or wake up ready to be done napping. We accepted her as the 40 minute napper.

Scarlet wearing Bandana Bib

At night, I would nurse her down and stay in bed with her until she fell asleep when I would sneak away to spend some time with G1. This was getting hard. She has the nose of a hound and could tell when I left. We knew we had to make a change.

SleepEasyBook

Our doctor recommended that we read a book titled “The Sleepeasy Solution: The Exhausted Parent’s Guide to Sleep from Birth to Age 5“. I had already read (most of) “Healthy Sleep Habits, Happy Child” and was enlightened with the science and reasoning behind the importance of sleep, but I was looking for more of a tutorial. I needed someone to tell me how to get my girl to sleep, not why she needed to sleep.

We wanted to eliminate these habits: 1. Co-sleeping 2. Nursing down (feeding her until she’s asleep) 3. Bouncing her to sleep

And hoped to replace them with these habits: 1. The ability to sleep in her crib 2. The ability to fall asleep on her own 3. The ability to stay asleep longer than 40 minutes 4. The ability to fall back asleep after she had woken up.

We dug into “The Sleepeasy Solution” on a Tuesday  night. We followed the guidelines of the book (prepared her environment, enforced a routine, and grabbed a few beers to make it through the crying). That night, before I layed her down to sleep, I gave her a really emotional hug and kissed her goodnight. I layed her down and walked out of the room and quickly fell into G1’s arms crying. The baby wasn’t even crying yet, but I was emotional as I would no longer have her under my wing all night long. I was emotional because our 4th trimester had drawn to a close and G3 was beginning to gain independence. (I know I’m sooo dramatic.)

So the first night began with tears and a few beers but this is what it looked like:

6:40 Bedtime

6:51 First Check (fell asleep after and slept for 45 minutes)

7:59 Second Check

8:09 Third Check

8:26 Fourth Check

8:50 Fifth Check (We waited 20 minutes because we noticed her crying was worse after we checked in. Since then we always wait 10  minutes before fist check)

9:00 Asleep

In total, the babe cried for 1 hour and 45 minutes on the first night. It was hard. Every piece of me wanted to run in and soothe her. Thankfully, G1 and I were able to hold strong and we are so happy we did. The rest of the night was beautiful. I would go in for her scheduled feedings (every 3 hours), pick her up and put her down without any crying. We were in disbelief! Was this really working? We tried not to get too excited on the first night.

sleeping Scarlet

The book recommends beginning sleep training at night and then swinging right into your naps the next day. Based on our experience with the check ups the night before, we decided to always wait 10 minutes for the first check up.  Here’s what our naps looked like the next day.

Wednesday Day

8:10 #1 Nap (asleep by 8:20)

9:00 Awake (left in her room for one hour to encourage her to take one hour naps)

9:15 Up

10:32 #2 Nap (fell asleep at 10:43 and slept until 11:10)

11:15 Check #1

11:25 Check #2 (cried off and on with longer intervals)

11:43 Check #3 (fell asleep at 12:52)

12:45 Awake/Up

1:30 #3 Nap

2:30 Awake/Up

4:05 #4 Nap (no crying so we didn’t check on her. She fell asleep at 4:25)

4:53 Check #1

5:06 Awake/Up

Wednesday Night

7:00 Bedtime

7:05 Check #1 (asleep at 7:15 – 7:38 )

8:00 Asleep (she had a lot of crying between 7:38 and 8:00. The cries were all spaced out far enough we knew she didn’t need checked on as it only made the crying worse)

9:15 Awake (began crying from 9:30-9:40)

9:40 Asleep (began scheduled feedings at 10)
There was no crying the rest of the night.

HappyCrib

Thursday Morning

7:15 Wake/Feed

8:30 #1 Nap *NO CRYING WHEN I PUT HER DOWN AND FELL ASLEEP RIGHT AWAY

9:30 Awake and Up (I noticed that she woke up and didn’t cry. She was just happy as a clam in her crib)

10:30 #2 Nap*During this nap, she kept waking and crying. I believe she was frustrated and was trying to get back to sleep. If I was to go in during this crying, her eyes would be closed. This is also when I learned about sleep cries (read #5) which happens while the baby is asleep, are often very piercing, and can last up to 10 minutes. I know when I heard these, that she wasn’t ready to get up because when she was ready to get up, she didn’t cry at all.

12:25 Awake and Up

2:03 #3 Nap (no crying to report here)

2:45 Awake (and happy as opposed to nap #2)

3:00 Up (I left her in there an hour for her to try and learn to nap for at least an hour)

4:22 #4 Nap

5:15 Up

I considered this a successful day! I couldn’t believe she was already able to sleep in her crib by herself as well as fall asleep by herself with only two nights of sleep training. Nap #2 was the hardest as I had to let her work through her frustration and learn to fall asleep on her own. That night we had a very successful night looking like this:

Thursday Night

6:45 Crib (We are slowly moving her bedtime later night by night )

Yup, that’s it. I went in for our scheduled feedings but we didn’t have to do any checks on her.

So if you took the time to read this and look over our schedules you’ll see that we had great success with this book and could report progress in as little as two nights.

1.Sleep in her crib? CHECK

2. Fall asleep on her own? CHECK

3. Stay asleep longer than 40 minutes? (We are definitely counting 45 minute naps as victories!) CHECK

4. Fall back asleep after she had woken up? CHECK

Now that we are a week into it, I am happy to report her night sleeping is amazing! Our babe is learning to self soothe herself and fall asleep on her own without any seep associations.  Her naps are improving. She has taken a few one and 1/2 hour naps but still struggles with frustrated crying. The book warns that naps are harder than nights as it takes the babe a while to calm down from being in an alert state. So we will continue with the Sleepeasy Solution.

We went from having a baby that would cry and wake the second you put her down to having a baby who falls asleep and stays asleep on her own in a matter of a week.

IMG_3175

Keeping it cool since 2014


Tagged , , , ,

My Tidyness Project {The Konmarie Method}

Tidying up

“Tidying is just a tool, not the final destination. The true goal should be to establish the lifestyle you want most once your house has been put in order. “

Why am I embarking on a tidyness project?  Marie Kondo recommends that I have a goal in mind. I can’t just tidy to tidy (HA- been doing that forever!). I need to tidy with a purpose. For me, I am choosing to tidy so that I might find what my true personal style is. Last October I became a mother and just last month, I decided to stay home full time. Leaving a great job as a visual merchandiser left me without  my creative outlet. When I chose to stay home, I knew I was going to pursue interior styling. I immediately  thought about my portfolio and what I can offer to people who might want to use my services, and it wasn’t that defined. By tidying I hope to define my own style so that I might be able to share my interior style with other likeminded folks and help them create the home they desire.

Now that I have visualized a destination or a goal, I can start. Let’s go over her key principles:

1. Discard First, Store Later

She means business here. Here is the order in which she recommends you approach your home: 1. Clothes 2. Books 3. Papers 4. Miscellany (komono) 5. Sentimental Value. For instance, during one time frame you would gather all of your clothes and put them all on the floor in front of you. This means gathering all of your clothes from the spare closet, and the coat closet, and the laundry, and anywhere else you might store your clothes, so you can grasp your overall volume of items. If we leave out the prom dresses you’re storing in the guest room, it’s out of site and out of mind. It will be most effective to do all of one category at one time. The sudden change can lead to a change of heart!

MarieKondo

Take every piece of clothing you have into your hands and find out if it sparks joy. Does this piece of clothing bring you happiness? Yes? Keep it. No? Pass it on.

If things are out of date and no longer functioning (thing broken radios or old make-up), toss them.

2. Tidy A Little A Day And You’ll Be Tidying Forever

That is a threat, people! I don’t want to tidy on this level more than once. I am hoping to have a home full of the things that I love and truly represent me so I am going to do it all at once, not multiple times. She says “Aim for Perfection”.

*Disclaimer: Remember how I mentioned I have a small child born in October, making her 4 months old? Yup, I’ll be stretching this over a few days. We have to be flexible here people!

3. Organized Clutter Is Still Clutter

We all love Ikea and their storage solutions, but that doesn’t mean we should be storing things that we don’t need and that don’t bring us joy. Sometimes these storage solutions are a beautiful way to conceal clutter. I don’t want that. I do, however, plan on utilizing her storage solutions. She recommends never piling things but, instead, store items vertically. Learn to fold and don’t pass your unwanted items onto family just because you can’t quite justify keeping it nor tossing it. Especially parents! Why would you want your parents to carry your burden. Looks like I need to get my wedding dress out from underneath my husband’s bed at my In-Laws.

Here’s my plan.

Day 1. Clothes

Day 2. Books

Day 3. Papers

Day 4. Miscellany

Day 5. Sentimental Value

*Again, these days may  or may not be consecutive.

I plan to focus on what I want to keep and not think of if as choosing what to get rid of. By keeping the items that spark joy and make me happy I will be able to “reset my life and embark on a new lifestyle”. Or in my case, after discarding everything that has been cluttering my life, I am going to to discover and pinpoint my personal style.


Tagged , , ,

DIY HeadBand Holder


At C3’s baby shower, my lovely hosts had all the supplies to make headbands for our little girl. Everyone made a headband and signed a little note to baby G. I almost put them in a jar, but wanted to be able to pick a headband quick and easy.

Everything I needed to make this wood head band holder was already on hand. The life of a hoarder, eh?
WoodHeadBandHolder8


The piece of wood I found was already the right size for the wall space I had picked to hang it. I applied two coats of Early American stain and called it good.

WoodHeadBandHolder1

WoodHeadBandHolder2


I painted the hooks with a few layers of Rustoleum white spray paint. Using a bunch of sample paints I had on hand, I chose 3 different shades of blue. I painted two hooks a bright pink/red that we used to paint the inside of her dresser drawers (more on that later).WoodHeadBandHolder3

WoodHeadBandHolder4


I made the mistake of painting the screw heads before I used them to attach the hooks. I ended up repainting the screws after I attached the hooks because I stripped the paint attaching them. WoodHeadBandHolder5

Do Not paint screw heads before using the screws to attach the hooks. I repeat: WASTE OF TIME!

Do Not paint screw heads before using the screws to attach the hooks. I repeat: WASTE OF TIME!

I attached two eye hole screws to the top of the shelf and found some old fabric to hang the head band holder with.

WoodHeadBandHolder7


WoodHeadBandHolder8


WoodHeadBandHolder9Voila. I have since changed out the fabric used to hang the head band holder and replaced it with a teal ribbon. I would post a picture but someone’s napping and we all know the saying… don’t wake a sleeping baby.


Tagged , , , ,

PomPom Curtains for a Nursery


February of last year, I started to style a little girl’s nursery, and in October of the same year, that little girl stole my heart. G1 and I were so excited to be adding a G3 to our clan and wanted to give her a bright energy filled room to encourage her creativity! We chose a yellow IKEA rug as our base. It has just the amount of movement and color that we needed. Everything else sort of revolved around that rug.

We had quite a few IKEA Vivian curtains on hand. These are a go-to curtain and work wonderfully in any room. I love to use what I have so we mounted the curtains and loved (like always) the light filtering through. Even as a novice parent, I knew I would have to eventually line them with blackout fabric, but more on that another time. Let’s just enjoy the light.

White IKEA Curtains

White IKEA CurtainsArcher even approves. I am always a little concerned when he smiles with his teeth showing- who taught him that?

Always a helpy-helperton!

Always a helpy-helperton!


I used one of my favorite sources, ETSY, to find some pom-pom trim. I was so happy with MODERN CLOTH’S Etsy shop and it turned out she’s located here in Washington, too. BONUS! She was great to work with, even digging in her own personal stash and making a custom order from the supplier. She has a great selection of fabric and notions. Long story short, I ended up with 25 yards of baby pom-poms in tangerine. They were perfect!

Easy peasy to apply. Line the trim on the side of your curtain and sew on top.

Orange Pom-Pom Trim Curtain


Orange Pom-Pom Trim Curtain

Orange Pom-Pom Trim CurtainThanks for looking!


Tagged , , , , , , , ,

Re-Arranging and Re-freshing an Apartment {Dylan and Kim}

Two of my favorite people in the world bought a house and it’s the cutest house on the block! In March, G1 and I traveled to San Diego to visit our old friends, Kim and Dylan, and their new house. Since moving in, they have been making  a lot of changes but since they knew I was coming, they left a few projects for me. Talk about good friends!

Let’s take a tour. If it’s not apparent to you, then NO, these are not Iphone photos… and if it is apparent, I’m guilty.

A view from the living room looking back at the entrance. Neither Kim or Dylan were smitten with the plastic vertical blinds that came with the house, so they had ordered new shades that had just been delivered and were waiting to be installed.


BeforeLivingRoom

This is an odd nook in the dining area. To the left is the table and to the right is the living room. This space is difficult to work with as furniture didn’t quite make sense; who needs a table next to the dining room table? So we had some brainstorming to do.
BeforeQuiltWall

Now you are looking at the kitchen bar window. I don’t think it was intended for bar-stool seating, but more of a means for opening the kitchen into the living room. To the left of this picture is the front door, behind the window is the kitchen, and left of the kitchen is the office area.
BeoforeKitchenWindow

This lonely lamp is in the corner next to the chair in the above picture.
BeforeGalleryWallYou can see the front door in the left of this photo. Kim and Dylan turned this room which used to be the dining room into an informal office/entryway. Behind the shelf in the corner is a drop through mail box. They were clever and placed the shelf there so the mail would have a landing spot.


BeforeOfficerWe got busy and changed out all the vertical blinds for horizontal wicker blinds. The blinds were an essential improvement! They transformed the room from immediately, making it feeling cozy and comfortable.


AfterLivingRoomRemember the odd nook next to the window in the dining area?


BeforeQuiltWall

Kim and I decided to hang her beautiful hand-made wedding quilt. For their wedding, they asked every guest to send a square of fabric with their RSVP and each piece was quilted into this beautiful heirloom. They used the quilt at their wedding during the ceremony.

We took a standard curtain rod and hung it on the wall and draped the quilt over it turning the quilt into a piece of art. It softened the dining room up and added color to the white wall.


AfterQuilt

I spy my square: two rows down and 7 squares from the left.


Remember the lonely lamp?


BeforeGalleryWall

We decided to dress up it’s equally lonely wall with a gallery arrangement.

All of the items featured on the wall were shopped from their home. This was a great project as all of her pieces were cohesive and she had a variety of items to chose from, including photos, canvases, coordinates to their wedding location (!), and the bow-tie their adorable pup Gus wore at their wedding. Swoon.


AfterGalleryWall2

We shifted the chair that was previously under the kitchen window into the corner, creating a cozy nook.


AfterGalleryWall

AfterGalleryWall3

The office/entryway used to look like this:


BeforeOfficer

We organized and decorated until we had a welcoming corner. The 4-square white wall unit is actually a shoe cabinet from Ikea. These are great if you don’t have a closet as they hide the shoes and can be used as an entry table.


AfterOffice

Ideally the shoes live in the cabinet. That is unless you are having a wild weekend with your friends from Seattle.


The bench against the other wall was also a piece from their wedding. They placed it at their reception and asked everyone to sign it – what a great idea! Everyone needs somewhere to sit down and put their shoes on, especially if you ask Mindy Kalling, AKA Kelly from The Office:

“There’s a certain meticulousness that I notice with all guys when they put their shoes on. First of all, they sit down. I mean, they need to sit down to do it. Right there, it signals, ‘I’m going to be here for awhile. Let’s get settled in.’ I can put on a pair of hiking boots that have not even been laced yet while talking on my cell phone, without even leaning on a wall.”

Dylan can appreciate the bench placement.

Since we removed their shelf from the corner where it was collecting mail and made room for the bench, we placed a small basket beside the bench to catch the mail. In addition to that, we hung a two-tier metal basket on the wall to further sort the mail.


AfterOfficer2

Welcome Home!


Acting as an entry table, the shoe cabinet hosts a phew photos and dried flowers.Kim found the mirror at a garage sale and it quickly found a home above the cabinet where both Kim and Dylan can quickly check themselves before they leave the house. Next to the mirror, Kim hung a twig that her and Dylan repurposed as a key-holder.


Thanks for letting me play in your home!


Tagged , , , , , , , , ,

Reorganize, Rearrange, and Refresh {Our Office}


I have been lusting after a magazine worthy office for quite some time. But let’s be honest. I didn’t want to spend the money on buying all new furniture and wanted to make what we had work! So when we decided to move all of our “office” stuff from our larger bedroom into our cozy bedroom, we really needed to be realistic about the furniture we wanted in there.

I love to shop my own house. It saves a lot of money and it’s exciting to find new uses and homes for things you already have – keeping it fresh! That’s exactly what we did. And would you believe we had an entire office set-up, matching to-boot, in our home already?


G2 Desk After

Here are a few before shots for dramas sake. Looking into our expected new office from our living room. With the glass paned windows, we were constantly looking into the room which provided extra motivation to get this place cleaned up.

Office Door Before


After we moved everything over from the larger room, we realized we had quite a bit of stuff in there. We were using the other room (with a large closet) for both office and sewing/crafting.

OfficeBefore

This is G1’s corner of the room.

I shopped the two wicker chairs from our dining room table. Matchy matchy is the name of the game. Office Before 2
Office Before 3

Office Before 4

And my corner. Here you can see that we had shopped 2 laptop desks and one shelving unit from Ikea from other areas of our home. They were a great choice for this room for a few reasons: 1. I needed 2 surfaces for our computers 2. They are shallow, taking up minimal space. 

Office Before 6After a few hours of cleaning and putting items in new homes, we ended up with a room that we actually like!


Office After Door


Office After 1

Office After 2


You can see how I made the paint card sample art here and the animal string art in the window,  here.

Office After 3

And for all our other items that needed a home, I ended up adding shelves tiny closet. I’ll post more about that later.


Tagged , , , ,

DIY Paint Sample Card Art

DIY Paint Sample Card ArtAll of the times I have been to the paint aisle examining paint colors has finally paid off. A while back, I found a frame at Goodwillys and brought it home. It wasn’t amazing. It was plastic made to look like wood and there was plastic in-place of any sort of glass.  But it worked! I very quickly through together a collage from my collection of paint sample cards (is that what you call them?). It remained this way for over 2 year! And it lived in the basement for nearly 1/2 of that time.

So after we reorganized and refreshed our office area, I decided that it was time to breathe new life into the piece.

Here is the original collage:
Paint Sample Card Art 1

ooooh – ahhhhhh

Paint Sample Card 2

During our office clean out we decided this ship painting on canvas needed to have a proper home. You can see here that the frame it’s living in now is a bit too big. Notice the spaces at the top and bottom.

Ship Painting Black Frame

Ship Painting Black Frame

I dug right in, hoping  it would turn out a little less collage-y and more arty.

I took out all the old paint sample cards from the original frame including the cardboard backing and recycled  what was left of the frame. Since I had used double sided tape to place them initially, a lot of them were ruined in the removal process… this limited my options a bit.

P1050441

There is a lack of in-progress shots! I used a paint sample card for a stencil, laying it on the larger sample cards, tracing around it, and then cutting out a new size. With the remaining colors that survived the removal process, I decided to do a sky, land, water piece. I used tape to adhere them to the cardboard and then framed it in the frame the ship had originally been in. Here is the final result.

oooh ahhhh.

Paint Sample Card Black Frame Paint Sample Card Black Frame 2

And here it is hanging next to my desk in our new office space.

Paint Sample Card Art Hanging

Paint Sample Art Card Hanging 2

Tagged , , , ,