Category Archives: DIY

DIY HeadBand Holder


At C3’s baby shower, my lovely hosts had all the supplies to make headbands for our little girl. Everyone made a headband and signed a little note to baby G. I almost put them in a jar, but wanted to be able to pick a headband quick and easy.

Everything I needed to make this wood head band holder was already on hand. The life of a hoarder, eh?
WoodHeadBandHolder8


The piece of wood I found was already the right size for the wall space I had picked to hang it. I applied two coats of Early American stain and called it good.

WoodHeadBandHolder1

WoodHeadBandHolder2


I painted the hooks with a few layers of Rustoleum white spray paint. Using a bunch of sample paints I had on hand, I chose 3 different shades of blue. I painted two hooks a bright pink/red that we used to paint the inside of her dresser drawers (more on that later).WoodHeadBandHolder3

WoodHeadBandHolder4


I made the mistake of painting the screw heads before I used them to attach the hooks. I ended up repainting the screws after I attached the hooks because I stripped the paint attaching them. WoodHeadBandHolder5

Do Not paint screw heads before using the screws to attach the hooks. I repeat: WASTE OF TIME!

Do Not paint screw heads before using the screws to attach the hooks. I repeat: WASTE OF TIME!

I attached two eye hole screws to the top of the shelf and found some old fabric to hang the head band holder with.

WoodHeadBandHolder7


WoodHeadBandHolder8


WoodHeadBandHolder9Voila. I have since changed out the fabric used to hang the head band holder and replaced it with a teal ribbon. I would post a picture but someone’s napping and we all know the saying… don’t wake a sleeping baby.


Tagged , , , ,

PomPom Curtains for a Nursery


February of last year, I started to style a little girl’s nursery, and in October of the same year, that little girl stole my heart. G1 and I were so excited to be adding a G3 to our clan and wanted to give her a bright energy filled room to encourage her creativity! We chose a yellow IKEA rug as our base. It has just the amount of movement and color that we needed. Everything else sort of revolved around that rug.

We had quite a few IKEA Vivian curtains on hand. These are a go-to curtain and work wonderfully in any room. I love to use what I have so we mounted the curtains and loved (like always) the light filtering through. Even as a novice parent, I knew I would have to eventually line them with blackout fabric, but more on that another time. Let’s just enjoy the light.

White IKEA Curtains

White IKEA CurtainsArcher even approves. I am always a little concerned when he smiles with his teeth showing- who taught him that?

Always a helpy-helperton!

Always a helpy-helperton!


I used one of my favorite sources, ETSY, to find some pom-pom trim. I was so happy with MODERN CLOTH’S Etsy shop and it turned out she’s located here in Washington, too. BONUS! She was great to work with, even digging in her own personal stash and making a custom order from the supplier. She has a great selection of fabric and notions. Long story short, I ended up with 25 yards of baby pom-poms in tangerine. They were perfect!

Easy peasy to apply. Line the trim on the side of your curtain and sew on top.

Orange Pom-Pom Trim Curtain


Orange Pom-Pom Trim Curtain

Orange Pom-Pom Trim CurtainThanks for looking!


Tagged , , , , , , , ,

Re-Arranging and Re-freshing an Apartment {Dylan and Kim}

Two of my favorite people in the world bought a house and it’s the cutest house on the block! In March, G1 and I traveled to San Diego to visit our old friends, Kim and Dylan, and their new house. Since moving in, they have been making  a lot of changes but since they knew I was coming, they left a few projects for me. Talk about good friends!

Let’s take a tour. If it’s not apparent to you, then NO, these are not Iphone photos… and if it is apparent, I’m guilty.

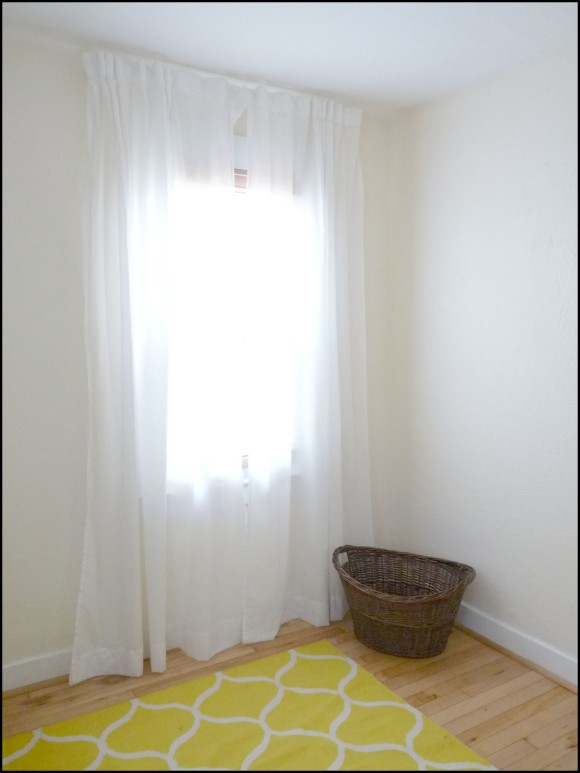
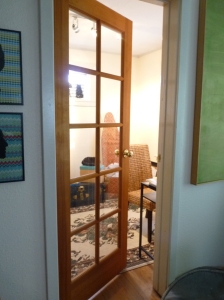
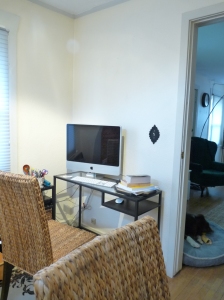
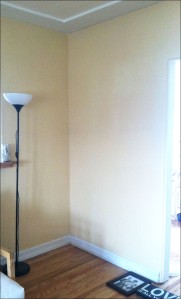
A view from the living room looking back at the entrance. Neither Kim or Dylan were smitten with the plastic vertical blinds that came with the house, so they had ordered new shades that had just been delivered and were waiting to be installed.


BeforeLivingRoom

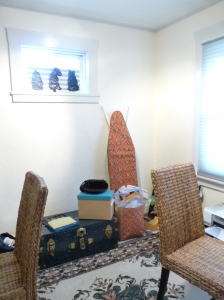
This is an odd nook in the dining area. To the left is the table and to the right is the living room. This space is difficult to work with as furniture didn’t quite make sense; who needs a table next to the dining room table? So we had some brainstorming to do.
BeforeQuiltWall

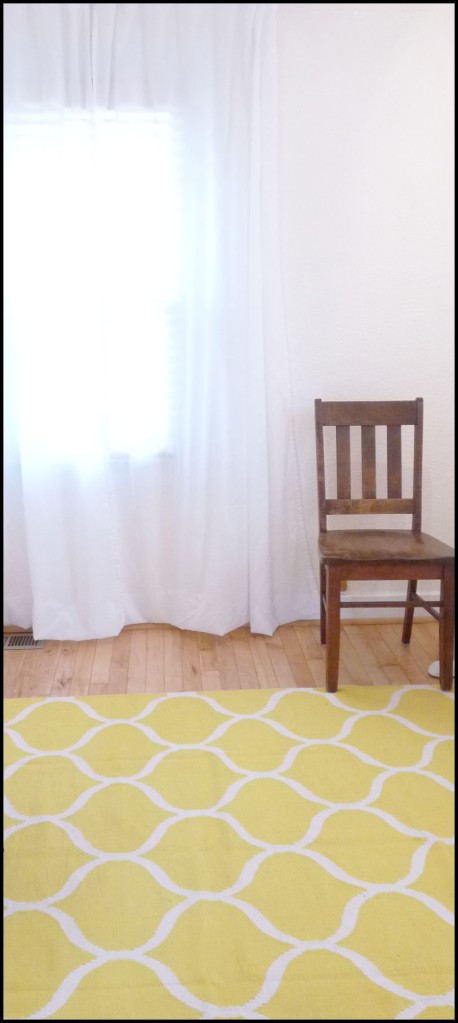
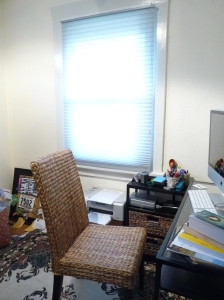
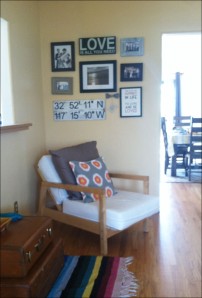
Now you are looking at the kitchen bar window. I don’t think it was intended for bar-stool seating, but more of a means for opening the kitchen into the living room. To the left of this picture is the front door, behind the window is the kitchen, and left of the kitchen is the office area.
BeoforeKitchenWindow

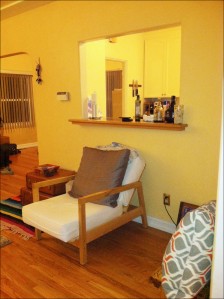
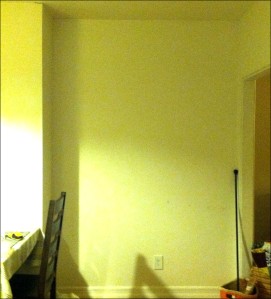
This lonely lamp is in the corner next to the chair in the above picture.
BeforeGalleryWall
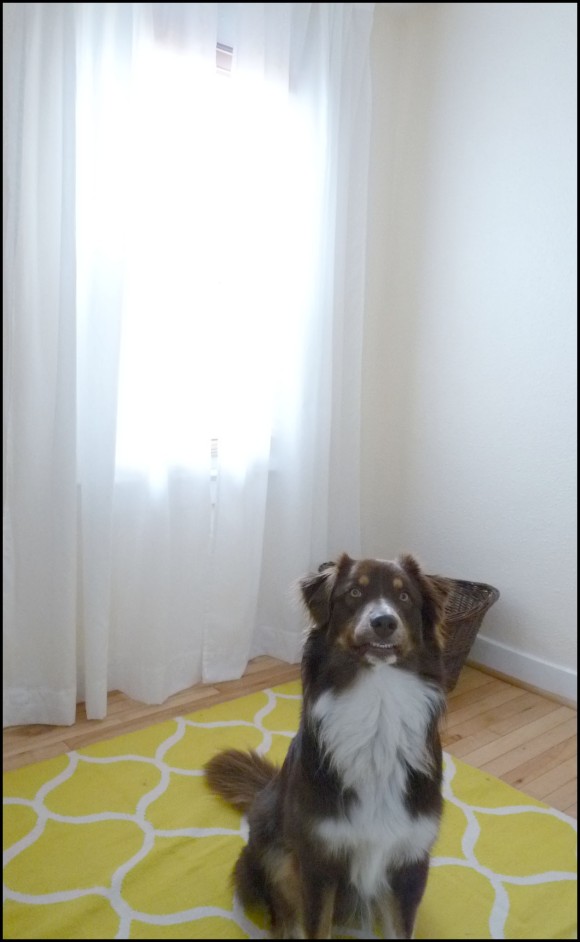
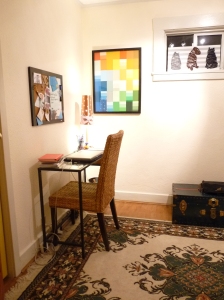
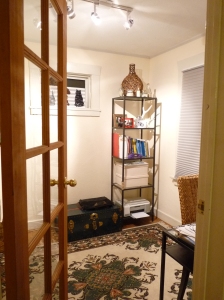
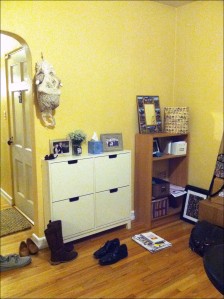
You can see the front door in the left of this photo. Kim and Dylan turned this room which used to be the dining room into an informal office/entryway. Behind the shelf in the corner is a drop through mail box. They were clever and placed the shelf there so the mail would have a landing spot.


BeforeOfficer
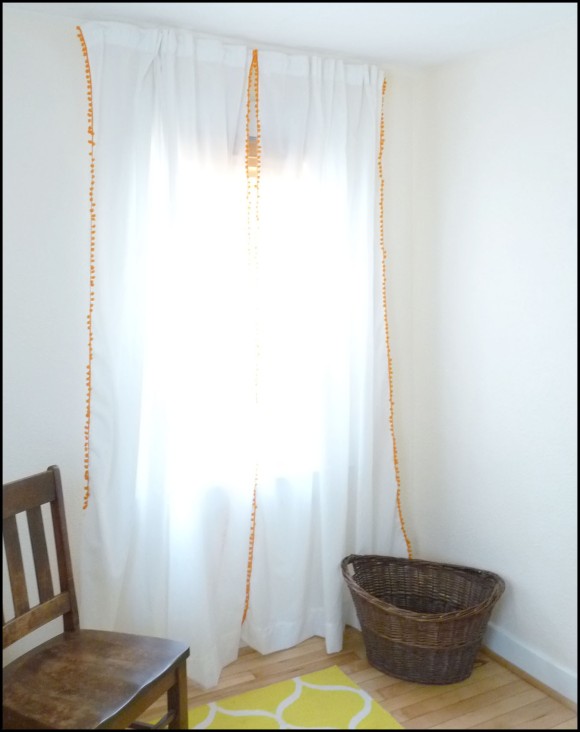
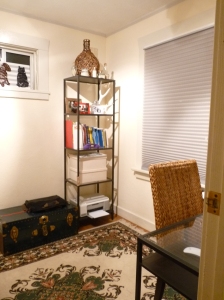
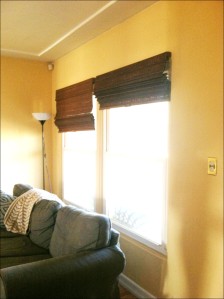
We got busy and changed out all the vertical blinds for horizontal wicker blinds. The blinds were an essential improvement! They transformed the room from immediately, making it feeling cozy and comfortable.


AfterLivingRoom
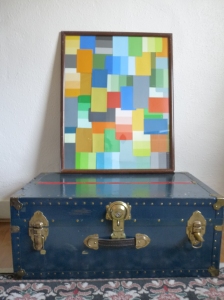
Remember the odd nook next to the window in the dining area?


BeforeQuiltWall

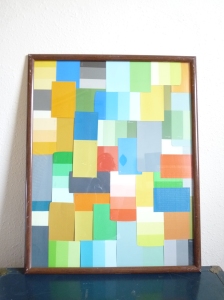
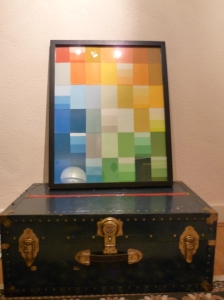
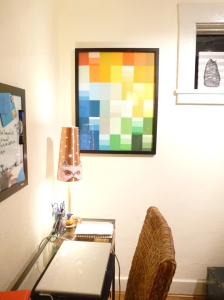
Kim and I decided to hang her beautiful hand-made wedding quilt. For their wedding, they asked every guest to send a square of fabric with their RSVP and each piece was quilted into this beautiful heirloom. They used the quilt at their wedding during the ceremony.

We took a standard curtain rod and hung it on the wall and draped the quilt over it turning the quilt into a piece of art. It softened the dining room up and added color to the white wall.


AfterQuilt

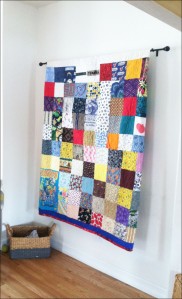
I spy my square: two rows down and 7 squares from the left.


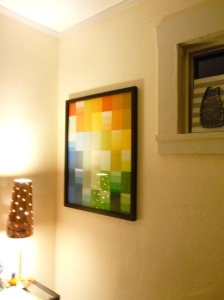
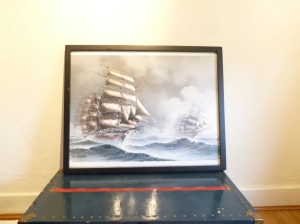
Remember the lonely lamp?


BeforeGalleryWall

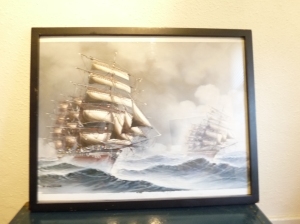
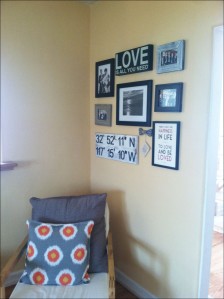
We decided to dress up it’s equally lonely wall with a gallery arrangement.

All of the items featured on the wall were shopped from their home. This was a great project as all of her pieces were cohesive and she had a variety of items to chose from, including photos, canvases, coordinates to their wedding location (!), and the bow-tie their adorable pup Gus wore at their wedding. Swoon.


AfterGalleryWall2

We shifted the chair that was previously under the kitchen window into the corner, creating a cozy nook.


AfterGalleryWall

AfterGalleryWall3

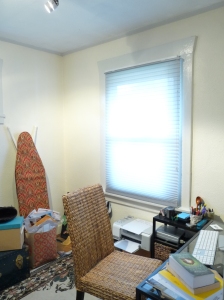
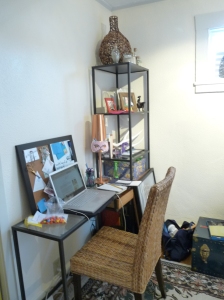
The office/entryway used to look like this:


BeforeOfficer

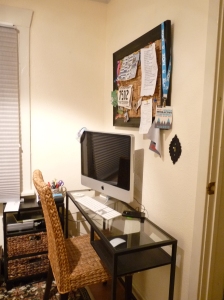
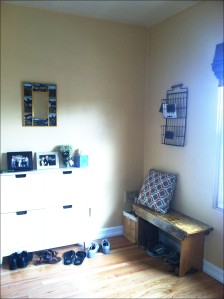
We organized and decorated until we had a welcoming corner. The 4-square white wall unit is actually a shoe cabinet from Ikea. These are great if you don’t have a closet as they hide the shoes and can be used as an entry table.


AfterOffice

Ideally the shoes live in the cabinet. That is unless you are having a wild weekend with your friends from Seattle.


The bench against the other wall was also a piece from their wedding. They placed it at their reception and asked everyone to sign it – what a great idea! Everyone needs somewhere to sit down and put their shoes on, especially if you ask Mindy Kalling, AKA Kelly from The Office:

“There’s a certain meticulousness that I notice with all guys when they put their shoes on. First of all, they sit down. I mean, they need to sit down to do it. Right there, it signals, ‘I’m going to be here for awhile. Let’s get settled in.’ I can put on a pair of hiking boots that have not even been laced yet while talking on my cell phone, without even leaning on a wall.”

Dylan can appreciate the bench placement.

Since we removed their shelf from the corner where it was collecting mail and made room for the bench, we placed a small basket beside the bench to catch the mail. In addition to that, we hung a two-tier metal basket on the wall to further sort the mail.


AfterOfficer2

Welcome Home!


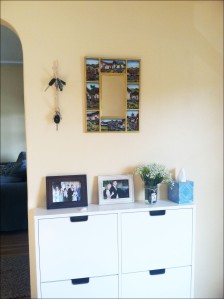
Acting as an entry table, the shoe cabinet hosts a phew photos and dried flowers.Kim found the mirror at a garage sale and it quickly found a home above the cabinet where both Kim and Dylan can quickly check themselves before they leave the house. Next to the mirror, Kim hung a twig that her and Dylan repurposed as a key-holder.


Thanks for letting me play in your home!
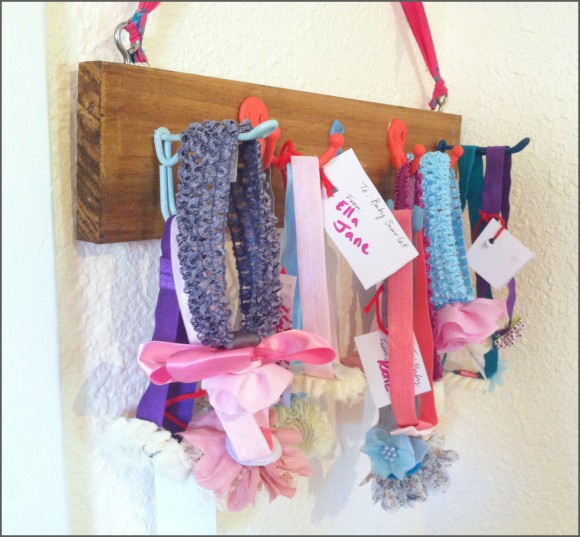
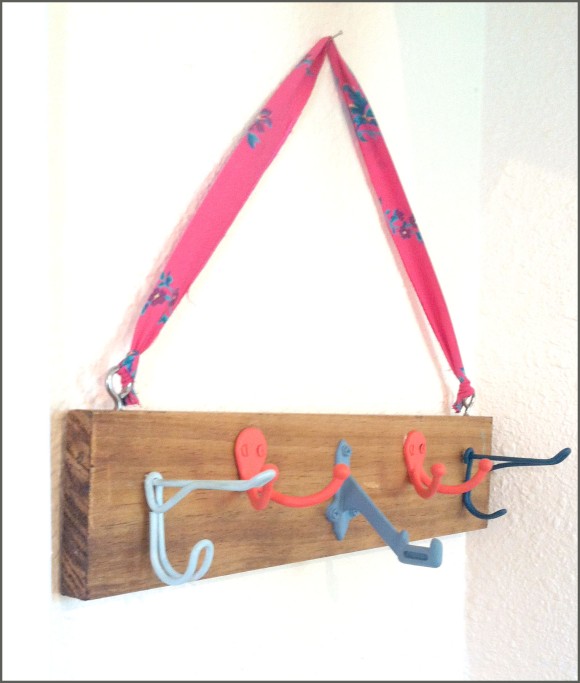
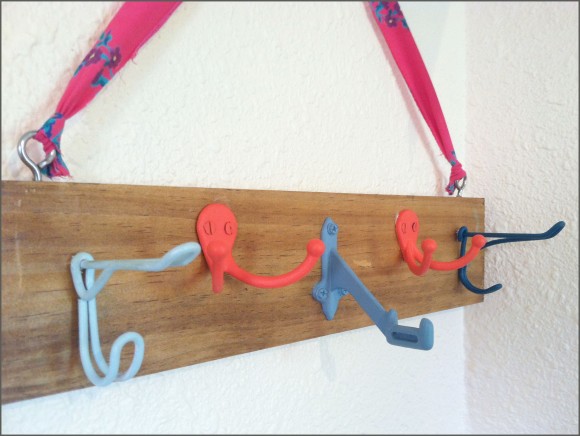


Tagged , , , , , , , , ,

Reorganize, Rearrange, and Refresh {Our Office}


I have been lusting after a magazine worthy office for quite some time. But let’s be honest. I didn’t want to spend the money on buying all new furniture and wanted to make what we had work! So when we decided to move all of our “office” stuff from our larger bedroom into our cozy bedroom, we really needed to be realistic about the furniture we wanted in there.

I love to shop my own house. It saves a lot of money and it’s exciting to find new uses and homes for things you already have – keeping it fresh! That’s exactly what we did. And would you believe we had an entire office set-up, matching to-boot, in our home already?


G2 Desk After

Here are a few before shots for dramas sake. Looking into our expected new office from our living room. With the glass paned windows, we were constantly looking into the room which provided extra motivation to get this place cleaned up.

Office Door Before


After we moved everything over from the larger room, we realized we had quite a bit of stuff in there. We were using the other room (with a large closet) for both office and sewing/crafting.

OfficeBefore

This is G1’s corner of the room.

I shopped the two wicker chairs from our dining room table. Matchy matchy is the name of the game. Office Before 2
Office Before 3

Office Before 4

And my corner. Here you can see that we had shopped 2 laptop desks and one shelving unit from Ikea from other areas of our home. They were a great choice for this room for a few reasons: 1. I needed 2 surfaces for our computers 2. They are shallow, taking up minimal space. 

Office Before 6After a few hours of cleaning and putting items in new homes, we ended up with a room that we actually like!


Office After Door


Office After 1

Office After 2


You can see how I made the paint card sample art here and the animal string art in the window,  here.

Office After 3

And for all our other items that needed a home, I ended up adding shelves tiny closet. I’ll post more about that later.


Tagged , , , ,

DIY Paint Sample Card Art

DIY Paint Sample Card ArtAll of the times I have been to the paint aisle examining paint colors has finally paid off. A while back, I found a frame at Goodwillys and brought it home. It wasn’t amazing. It was plastic made to look like wood and there was plastic in-place of any sort of glass.  But it worked! I very quickly through together a collage from my collection of paint sample cards (is that what you call them?). It remained this way for over 2 year! And it lived in the basement for nearly 1/2 of that time.

So after we reorganized and refreshed our office area, I decided that it was time to breathe new life into the piece.

Here is the original collage:
Paint Sample Card Art 1

ooooh – ahhhhhh

Paint Sample Card 2

During our office clean out we decided this ship painting on canvas needed to have a proper home. You can see here that the frame it’s living in now is a bit too big. Notice the spaces at the top and bottom.

Ship Painting Black Frame

Ship Painting Black Frame

I dug right in, hoping  it would turn out a little less collage-y and more arty.

I took out all the old paint sample cards from the original frame including the cardboard backing and recycled  what was left of the frame. Since I had used double sided tape to place them initially, a lot of them were ruined in the removal process… this limited my options a bit.

P1050441

There is a lack of in-progress shots! I used a paint sample card for a stencil, laying it on the larger sample cards, tracing around it, and then cutting out a new size. With the remaining colors that survived the removal process, I decided to do a sky, land, water piece. I used tape to adhere them to the cardboard and then framed it in the frame the ship had originally been in. Here is the final result.

oooh ahhhh.

Paint Sample Card Black Frame Paint Sample Card Black Frame 2

And here it is hanging next to my desk in our new office space.

Paint Sample Card Art Hanging

Paint Sample Art Card Hanging 2

Tagged , , , ,

Merman

After a trip to Goodwill I ended up with an old frame with a wood backing to it. I really had no idea what to do with it so I gathered a few different blue paints I had from past projects and began painting. It quickly began to look like water and I thought that was OK. It remained that way for many months. Recently I decided I needed a rather large piece to use in the bathroom so I pulled it out (thinking it was calming) and hung it up. It was all wrong and so bland! It was very obvious it needed to have a mermaid swimming in it. DUH!

Mermaid Tail

20140210-185532.jpg

I used a white chalk marker and drew directly onto the painted surface. It took a few layers.  I then began to draw a pattern in the middle with a pencil. After I was satisfied with my pattern, I used blue chalk markers to trace over the pencil lines.

20140210-185551.jpg

I used 2 different shades of blue, a gold marker,  and weighted the lines. 20140210-185606.jpg

The finished result:

20140210-185631.jpg

I love it in our bathroom – just the splash we needed.

20140210-185651.jpg

Tagged , , , ,

Dried Orange Bunting


I saw this on Pinterest and decided to give it a try. The smell of the baking oranges was heavenly and I really enjoyed the burst of energy in our windows.

Dried Orange Bunting

There aren’t too many steps:

1. Slice the orange.

2. Lie slices on a baking sheet. I chose to line mine with parchment paper.

3. Set in over at a low temp. I chose 200 and watched them for about 30 minutes. Everyone’s oven is different!

Dried Orange Baking

I let mine sit for around 15 minutes and enjoyed the aroma!

Dried Oranges Cooling

I took a thread and needle and strung them together. To keep them from sliding around I tied each one into place with a knot.

Dried Oranges Hanging


Enjoy! Dried Orange

Tagged , , ,

Framed Wedding Program

While cleaning a closet I stumbled upon a bit of wedding paraphernalia. What to do with it? I loved our programs, and invitations that G1 designed and wanted to see them everyday. I pulled my go-to decor move and framed three pieces in a double glass frame. And now they are floating on our shelfs dedicated to us. Don’t worry – the shelves are in our room so our friends aren’t nauseated when they come over.

20140205-182927.jpg

20140205-182950.jpg

20140205-183010.jpg

20140212-211939.jpg

Tagged , ,

Textured Window Film Treatment

Our back door in the kitchen has been giving me a hard time. I fell in love with the sectioned window panes and then the night fell and I felt exposed. After months of living with the abuse, I decided to cover it up with lace, hoping to cherish the sunlight that did make it through. And I did a rush job and ended up with this:20140203-174646.jpg

And when I decided that I wanted it to actually look nice, I decided to start over. I stripped the door of its lace blanket and this is what I saw:

20140203-174708.jpg

The back yard. Having a view is nice, but like I mentioned before, I need to feel safe!

So I headed to Home Depot and picked up some Artscape Textured Window Film. The  application process was very easy. All I needed was water and clean windows. The package came with a squeegee. I ended up using two of the smaller sizes (24×36) and finished in an evening, even after driving back to the Home Depot to pick up a second roll of film.

The end results:

20140203-174731.jpgI feel safe and better yet, proud that I didn’t leave my shotty curtains up!

Tagged , , , ,

DIY Wall Paper { Yes, it’s paper on the wall}

Butterfly Wall Paper I am a renter and I am blessed with a wonderful landlord who allows me to paint. I am so lucky in the renters world. The other day I decided to paint the bathroom and after I had bumped the toilet and caused it to leak, I called my landlord when she reminded me that the bathroom was the ONLY room in the house that she would like left as is. SHOOT! I felt awful and now I am a bit wary for tackling any painting projects. It’s not that she won’t allow me to; she wrote me a nice email saying that I could paint any other room that I wanted and to enjoy it. But as I tackle my remorse, I am creating more ways to change my surroundings in a way that is easily reverted back to normal.

At work, I stumbled upon paper place-mats. They were beautiful with colors and different designs. Intended to be used at the table and then thrown away, I saw a different use. Wallpaper! And when they were marked down and put on the sale table, I immediately snagged up the butterflies,  and owls, and knives, and spoons and forks! I went a bit overboard. I had the perfect place for them – I found them a landing headed upstairs to our loft bedroom.

I didn’t take a before shot, but I do have a few somewhat questionable photos of my pets on the stairs:

Archer Stairs Before

Black Cat to Grey Cat: "Show me how you walk seductively"

Black Cat to Grey Cat: “Show me how you walk seductively”

"I'll try to walk seductively, as well."

“I’ll try to walk seductively, as well.”


I had my pad of Kitchen Papers in Butterfly, double-sided tape, a pencil, scissors, and a ruler. WARNING: you may not be able to stop taping paper to your walls. ADDICTING.

I started at the top and taped my first one on and then began to tape the others on side by side.

Kitchen Paper Butterflys


And I kept moving down from there.

Second RowAnd when I got to the corners where I couldn’t lay down an entire sheet, I left a blank space. I saved these spaces for the end so that I could tape up all the full sheets and then use the remaining pieces to fill in the holes.

Butterfly Wall Papers

Wall Papers with G1


To make the pieces fit into the empty spaces, I lined up the piece with the others and then placed it where it went, and when I reached the area that needed to be cut off, I grabbed my ruler and pencil and drew a line. I then cut the remainder off, and then taped down my new piece. I filled in all the empty spaces that ran along the hand-rail and then cut pieces to fit around the shelf.
image (5)

image (1)

Butterfly Wall Paper


The entire process took maybe 40 minutes and it really packs a punch. I feel great that I can take it down when we move and that we have a beautiful stairway.

Again:

BEFORE

"This hallway needs more character if I am going to shine!"

“This hallway needs more character if I am going to shine!”

AFTER

Butterfly Wall Paper


Tagged , , , , , ,